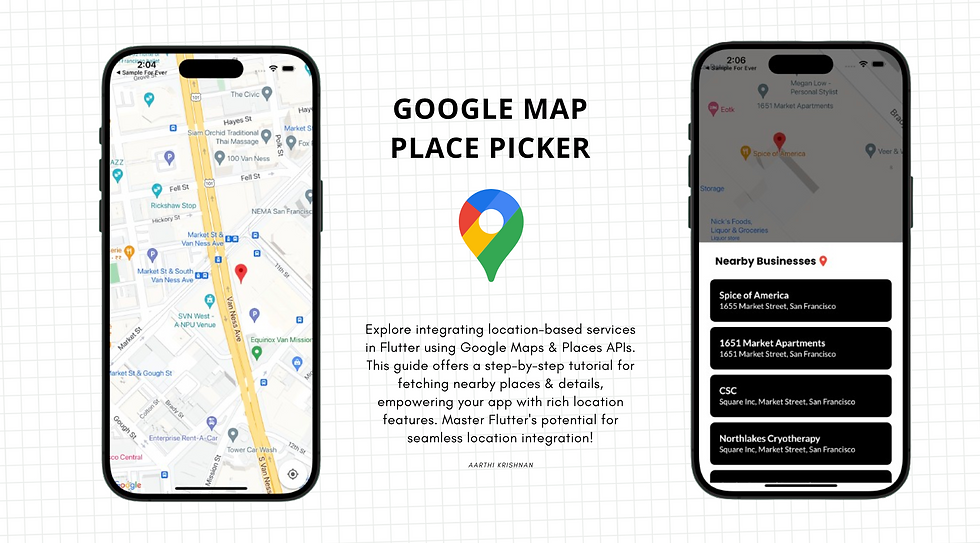
How to Implement Google Map Search in Flutter
- Aarthi Krishnan

- May 18, 2024
- 3 min read

Hey guys This is me Aarthi Krishnan❤️. In this guide, I will walk you through the process of integrating Google Maps into your Flutter application. I will cover everything from setting up your project to adding search functionality using the Google Places API. By the end of this tutorial, you will have a fully functional map application that allows users to search for places and view their details.
Table of Contents
Introduction to Flutter and Google Maps
Setting Up Your Flutter Project
Adding Dependencies
Configuring Google API Keys
Building the Main Application
Creating the Map Screen
Implementing the Search Functionality
Displaying Place Details
Full Source Code
Testing Your Application
Conclusion
Introduction to Flutter and Google Maps
Flutter is a powerful framework for developing cross-platform mobile applications, and Google Maps is a widely used service for integrating maps and location-based services into applications. By combining these two, a robust map-based application can be created.
Setting Up Your Flutter Project
Ensure that Flutter is installed on your system. Follow the official installation guide if needed. After installation, use the following command to create a new Flutter project:
flutter create google_map_search_flutter
You can change your project name. In here i just giving google map search flutter.
Adding Dependencies
To integrate Google Maps and Places, we need to add the following dependencies to our pubspec.yaml file:
dependencies:
  flutter:
    sdk: flutter
  google_maps_flutter: ^2.0.6
  flutter_google_places_hoc081098: ^0.5.0
  google_place: ^0.4.0
  google_maps_webservice: ^0.0.21
  google_fonts: ^3.0.1
Run flutter pub get to install the dependencies.
Configuring Google API Keys
To use Google Maps and Places, you need to enable the APIs and obtain API keys from the Google Cloud Console. Enable the following APIs:
Maps SDK for Android
Maps SDK for iOS
Places API
After enabling the APIs, generate an API key and add it to your Flutter project.
Building the Main Application
Create a new file main.dart and add the following code:
import 'package:flutter/material.dart';
import 'package:flutter_google_places_hoc081098/flutter_google_places_hoc081098.dart';
import 'package:google_fonts/google_fonts.dart';
import 'package:google_maps_flutter/google_maps_flutter.dart';
import 'package:google_place/google_place.dart' as google_place;
import 'package:google_maps_webservice/places.dart' as google_maps_webservice;

void main() => runApp(MyApp());

class MyApp extends StatelessWidget {
  @override
  Widget build(BuildContext context) {
    return MaterialApp(
      debugShowCheckedModeBanner: false,
      title: 'Maps Demo',
      home: MapScreen(),
    );
  }
}
Creating the Map Screen
In the same file, define the MapScreen widget and its state:
class MapScreen extends StatefulWidget {
  @override
  _MapScreenState createState() => _MapScreenState();
}

class _MapScreenState extends State<MapScreen> {
  GoogleMapController? mapController;
  List<PlaceDetails> _selectedPlaces = [];

  google_place.GooglePlace googlePlace =
      google_place.GooglePlace("YOUR_API_KEY_HERE");

  void _onMapCreated(GoogleMapController controller) {
    mapController = controller;
  }
Implementing the Search Functionality
Add the search functionality to the _MapScreenState class:
Future<void> _searchPlaces() async {
    final p = await PlacesAutocomplete.show(
      context: context,
      logo: Text(""),
      mode: Mode.overlay,
      apiKey: "YOUR_API_KEY_HERE",
      onError: (response) {
        ScaffoldMessenger.of(context).showSnackBar(
          SnackBar(
            content: Text(response.errorMessage ?? 'Unknown error'),
          ),
        );
      },
    );

    if (p != null) {
      final places = google_maps_webservice.GoogleMapsPlaces(
          apiKey: "YOUR_API_KEY_HERE");
      final details = await places.getDetailsByPlaceId(p.placeId!);
      final lat = details.result.geometry!.location.lat;
      final lng = details.result.geometry!.location.lng;
      final name = details.result.name;
      final address = details.result.formattedAddress;

      final placeDetails = PlaceDetails(
        name: name,
        address: address!,
        location: LatLng(lat, lng),
      );

      setState(() {
        _selectedPlaces.add(placeDetails);
      });

      // Print all selected place details
      for (PlaceDetails place in _selectedPlaces) {
        print('Name: ${place.name}');
        print('Address: ${place.address}');
        print(
            'Location: ${place.location.latitude}, ${place.location.longitude}');
      }

      // Move camera to the latest selected location
      mapController?.animateCamera(
        CameraUpdate.newLatLngZoom(
          LatLng(lat, lng),
          14.0, // You can adjust the zoom level as needed
        ),
      );
    }
  }
Displaying Place Details
Update the build method of _MapScreenState to display the map and the search button:
  @override
  Widget build(BuildContext context) {
    return Scaffold(
      body: Stack(
        children: [
          Column(
            children: [
              Expanded(
                child: GoogleMap(
                  onMapCreated: _onMapCreated,
                  initialCameraPosition: CameraPosition(
                    target: LatLng(37.7749, -122.4194),
                    zoom: 10,
                  ),
                  markers: _selectedPlaces.map((place) {
                    return Marker(
                      markerId: MarkerId(place.location.toString()),
                      position: place.location,
                      infoWindow: InfoWindow(
                        title: place.name,
                        snippet: place.address,
                      ),
                    );
                  }).toSet(),
                ),
              ),
            ],
          ),
          Positioned(
            top: 80,
            right: 110,
            child: InkWell(
              onTap: () {
                _searchPlaces();
              },
              child: Container(
                alignment: Alignment.center,
                decoration: BoxDecoration(
                    color: Color.fromARGB(255, 0, 0, 0),
                    borderRadius: BorderRadius.all(Radius.circular(5.0))),
                child: Row(
                  children: [
                    IconButton
Full Source Code
For your reference here is full source code. You can download my complete project by clicking below button.
Testing Your Application
Run your application on an emulator or a physical device. Use the search functionality to find places and see the map update with markers and information windows displaying the place details.
Conclusion
In this comprehensive guide, we've walked through the steps to create a Flutter application that integrates Google Maps and Google Places API. We've covered setting up the project, adding necessary dependencies, configuring API keys, and implementing search functionality. By following these steps, you can build a powerful map-based application in Flutter.
By integrating these features, you can enhance user experience and provide valuable location-based services within your Flutter applications. Happy coding!❤️

Comments